With the Quest Pro v53 firmware, you can now globally enable local dimming with an ADB command.
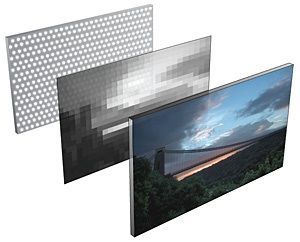
Most LCD panels have at most a few LEDs backlighting the entire display, severely limiting the contrast between dark and bright regions. You’ve probably noticed they show dark grey instead of true black. In VR this notably hampers the visual believability of virtual nighttime and experiences set in space.
The main advantage of OLED (eg. PlayStation VR2 and BigScreen Beyond) over LCD is there are no backlights – each pixel is self-illuminating, enabling effectively unlimited contrast and true blacks.
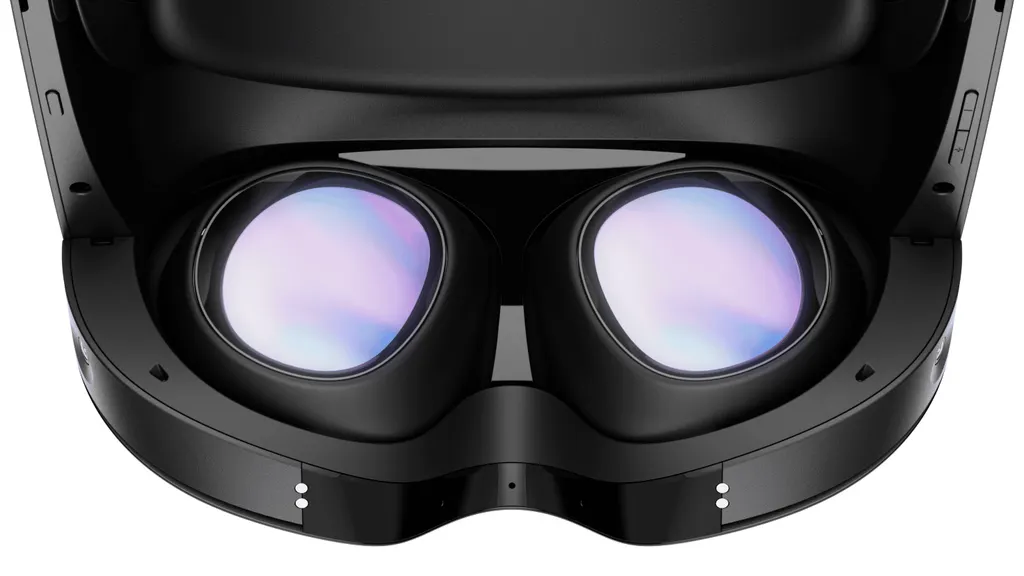
LCDs with local dimming, such as the Quest Pro panels, offer a middle-ground solution. They have many backlights to control brightness in zones – in Quest Pro’s case over 500 mini LEDs.
However, local dimming on Quest Pro is opt-in per-app. App developers have to enable it. Otherwise, all 500+ backlights will act together with the same brightness as if a regular LCD.
Keep in mind that local dimming has a noticeable tradeoff though: blooming. Since the backlighting resolution is so much lower than the color resolution – on Quest Pro just 500 mini LEDs for almost 4 million pixels – many dark-colored pixels adjacent to light ones will also be illuminated. Mini LED is a big step over traditional LCD, but is not a full substitute for OLED.
How To Use Force Enable It
To force enable local dimming you'll need to use an ADB command. If you don't know what that is don't worry, we'll walk you through it. If you do, you can skip to the end.
Enable Developer Mode
To run any ADB command you’ll need to enable Developer Mode. If you’ve already done that, you can skip this section.
To enable Developer Mode, you have to be a registered Meta Quest “developer”. It's free to sign up.
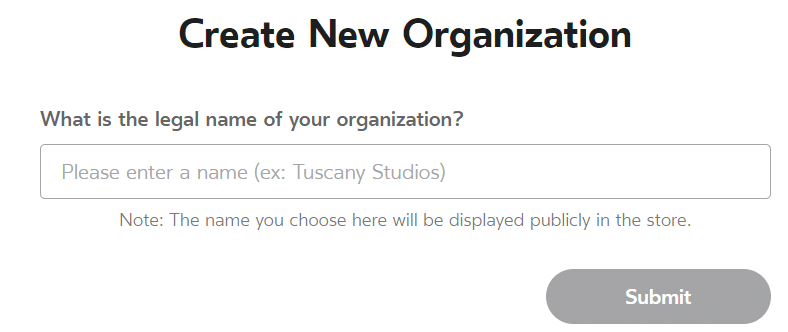
Go to dashboard.oculus.com on your PC and create an ‘organization’. You’ll be asked to accept the developer agreement.
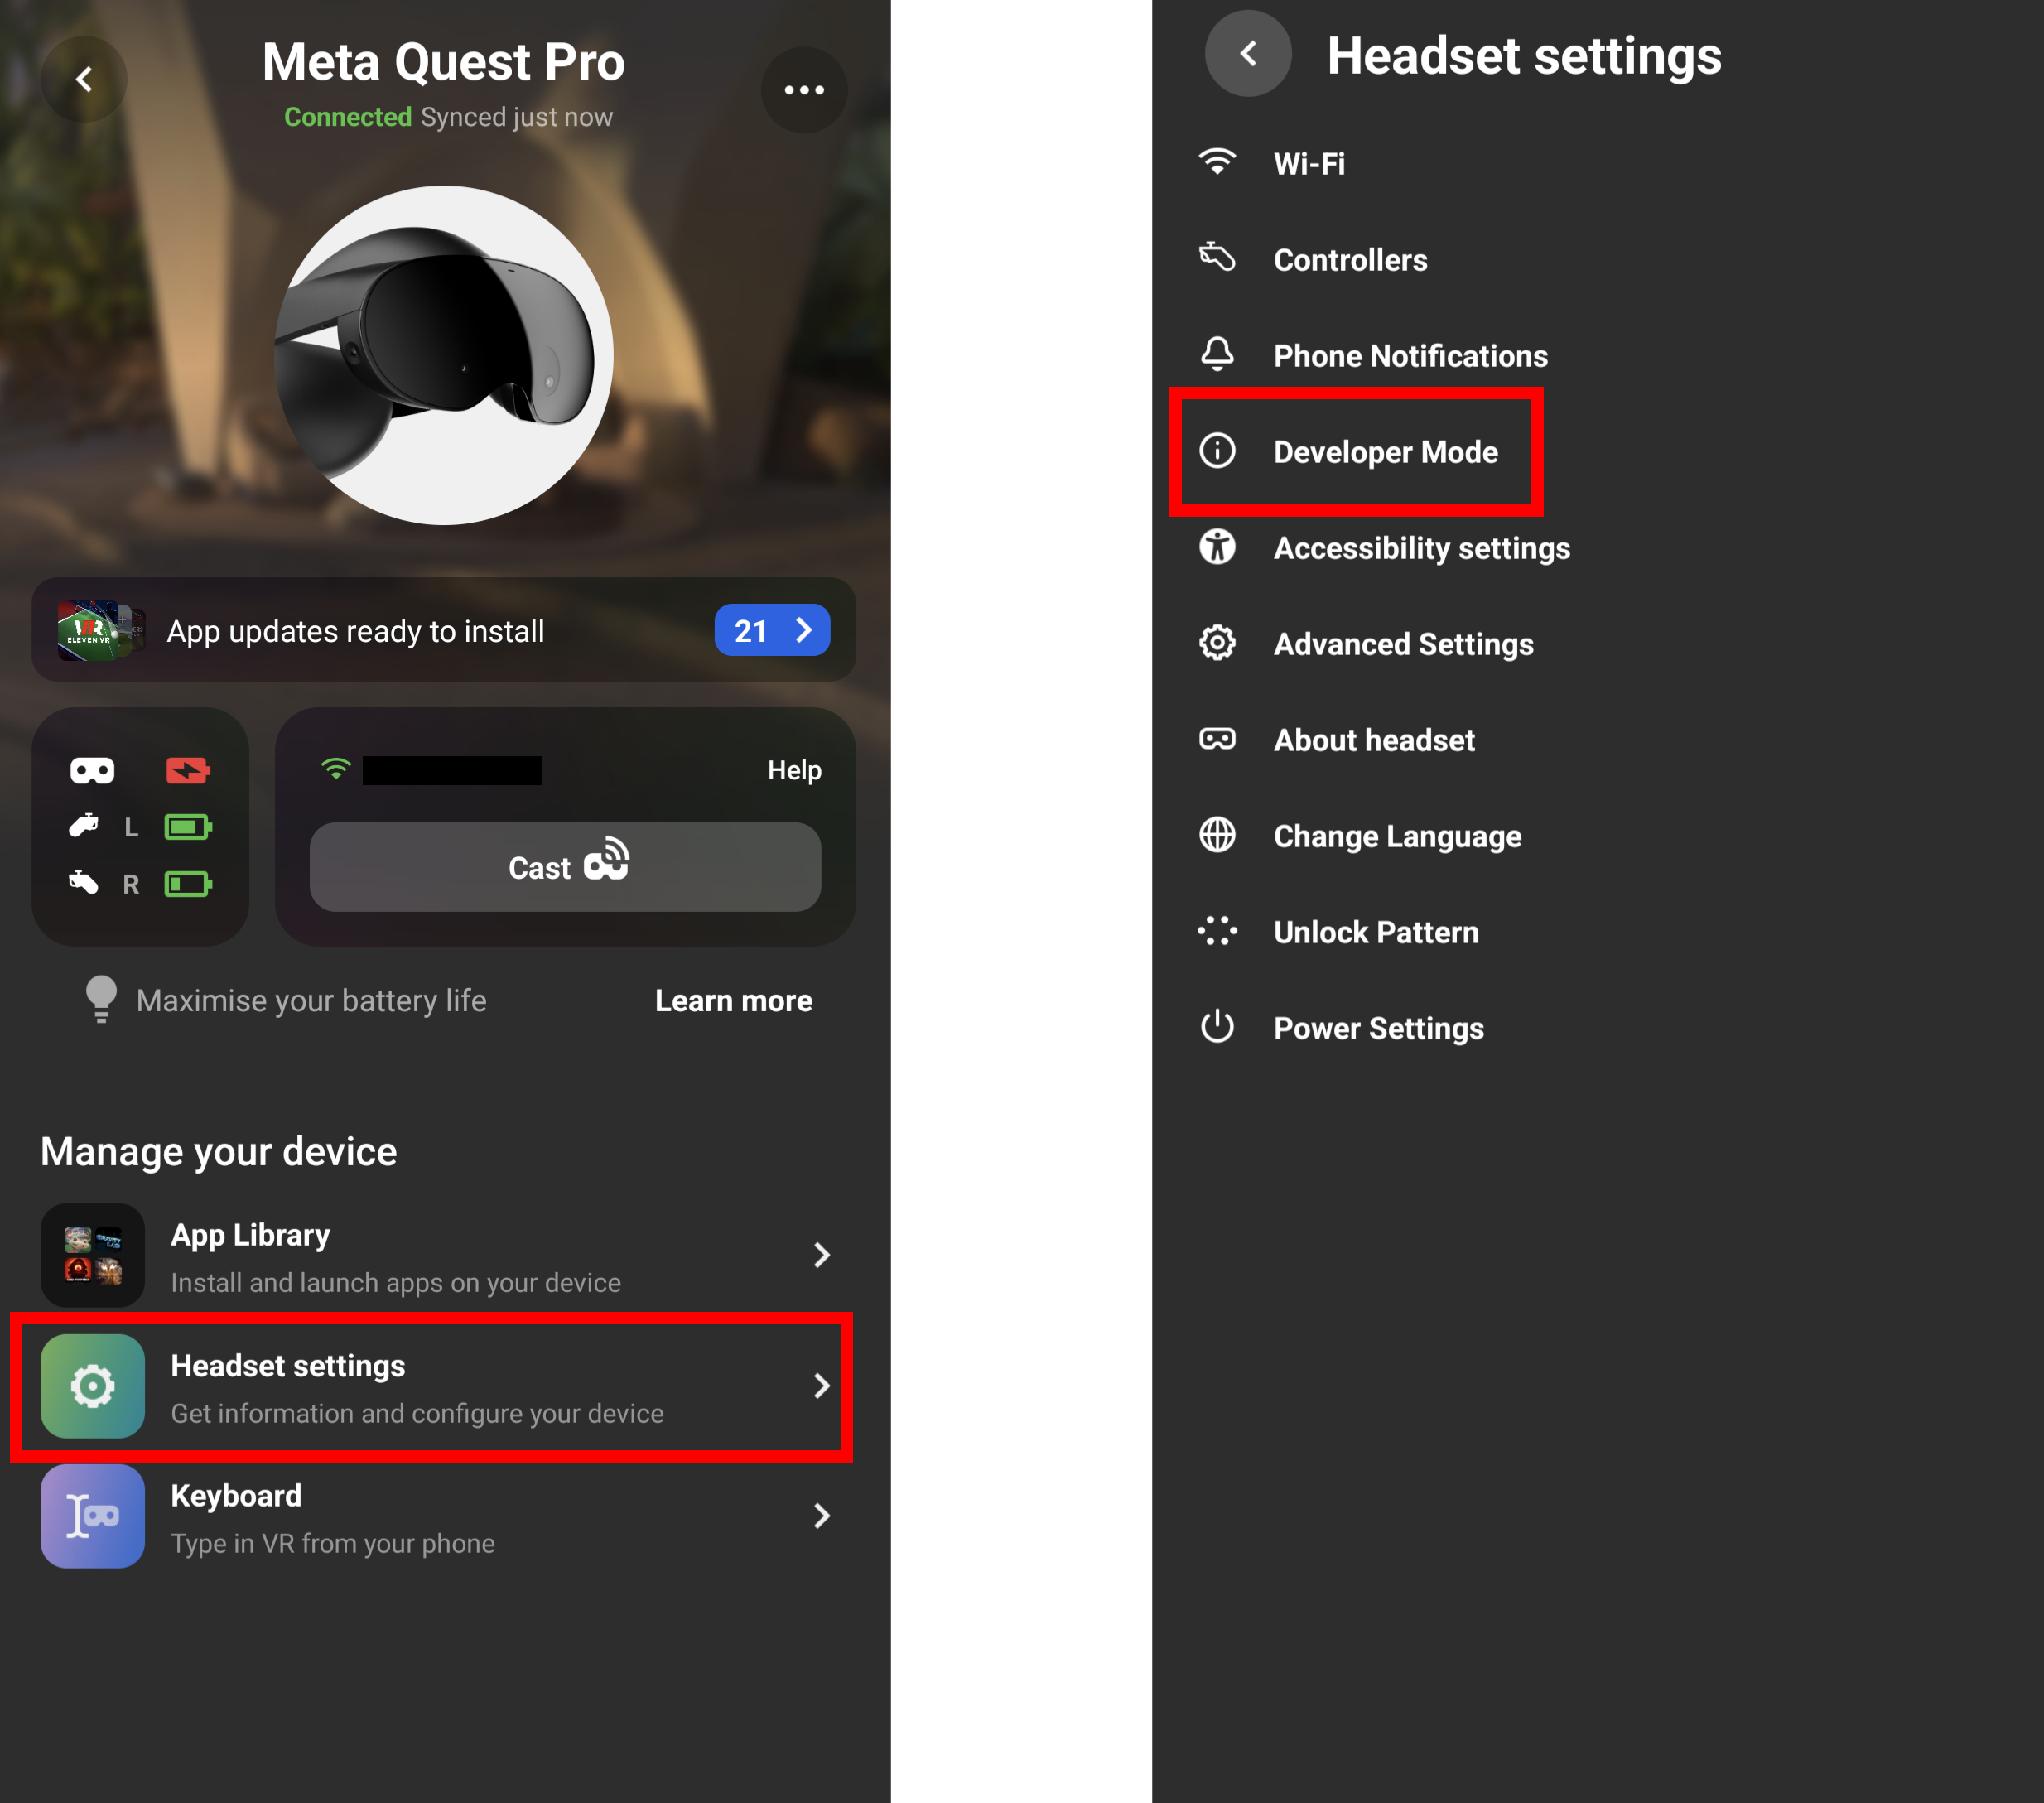
Now that you’re a “developer”, open the Meta Quest app on your smartphone or tablet. Tap on your headset then tap ‘Headset settings’. In the list, you should now see Developer Mode.
Install Meta Quest Developer Hub
While you can run ADB commands raw in the Windows command line, it's a lot easier to use the Meta Quest Developer Hub - especially since the command doesn't persist between headset restarts.
You can download it from the Quest Developer website. Once it's installed, follow the on-screen steps to connect your headset to it.
Create & Run The Command
Under the Device Manager tab, click 'Add' under 'Create an ADB Command' and enter the following under COMMAND:
adb shell setprop debug.oculus.localDimming 1
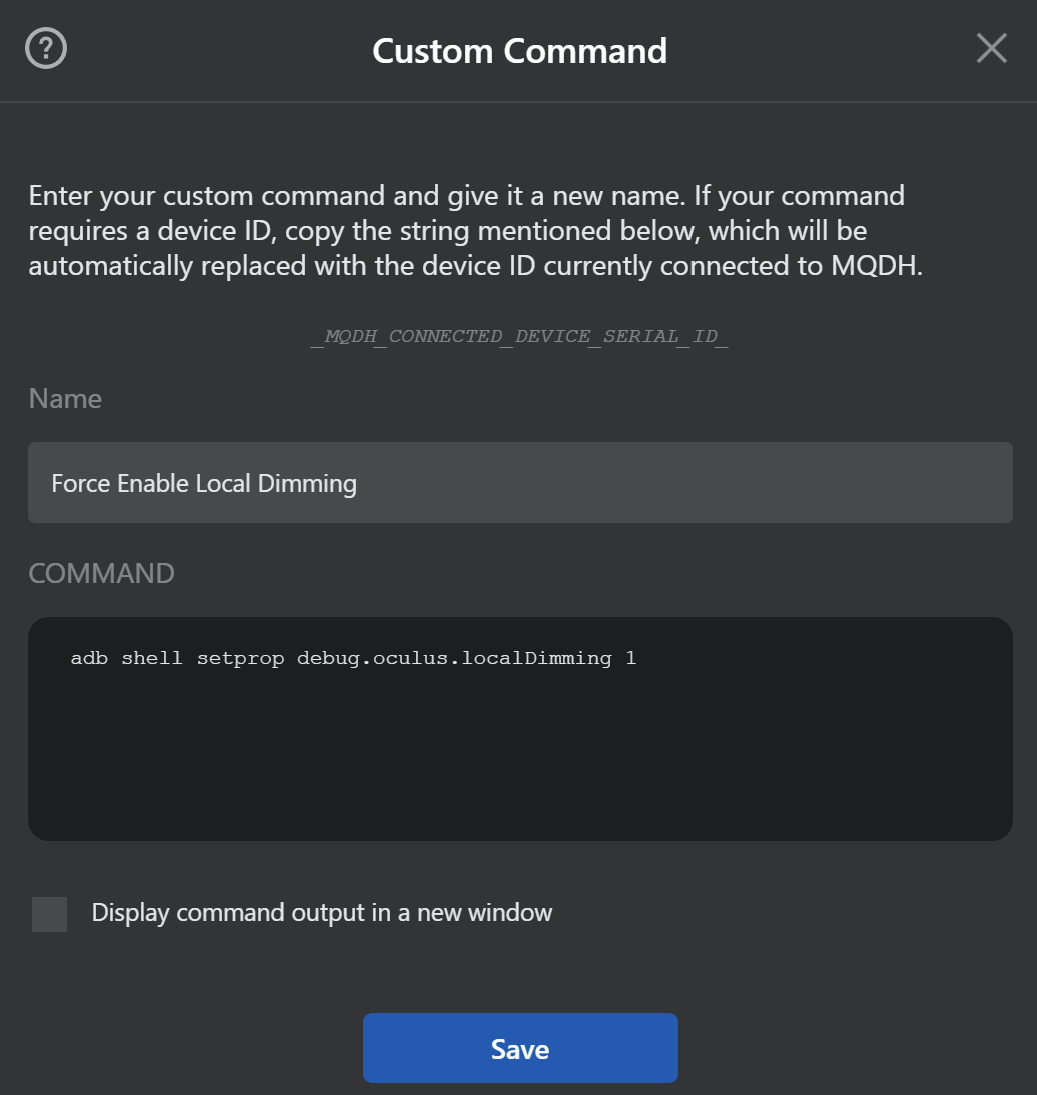
You can give it whatever name you want, such as 'Force Enable Local Dimming'.
To run it just click 'Run'. You should notice improved contrast and deeper black levels in all your games. But you'll need run the command every time you reboot your headset, as forcing local dimming doesn't persist between restarts.
Remember that this command requires firmware version v53. If you don't have v53 yet, it won't work.